Setting Up Payment Activation with Sellencer on Shopify
Sellencer integrates with Shopify Billing to handle commissions and application fees efficiently. To start using Sellencer, follow these steps to activate your payment service:
Step-by-Step Guide to Payment Activation
Step 1: Understanding Shopify Billing
- Shopify Billing: Sellencer leverages Shopify’s billing system to process commissions and application fees. This ensures a secure and seamless transaction experience for both store owners and influencers.
- Terms and Conditions: For more details, refer to the Shop Terms & Conditions.
Step 2: Activate Payment Service
- Access Payment Settings:
- Go to your Shopify admin panel.
- Navigate to the “Sellencer” app.
- Select “Settings.”
- Activate Payment:
- Click the “Activate Payment” button.
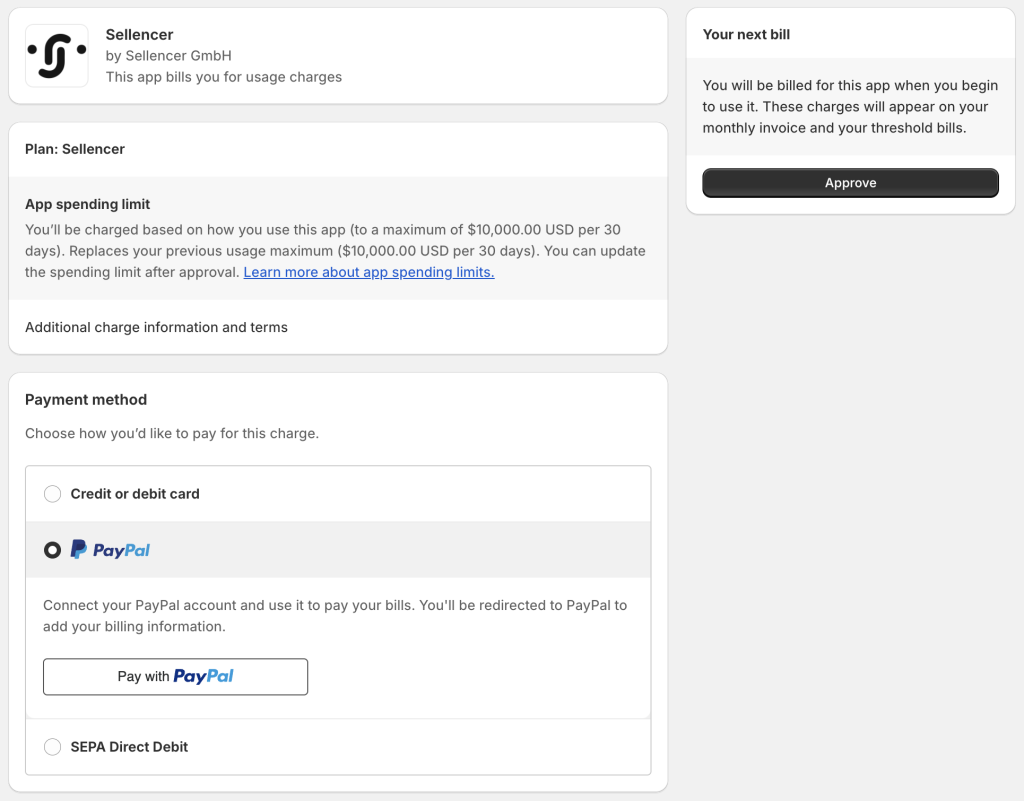
- You will be navigated to the “Approve Subscription” page.
- Review the app spending limit and payment method options.
- Choose your preferred payment method (Credit/Debit Card, PayPal, SEPA Direct Debit).
- Click “Approve” to finalize the activation.


- Confirmation:
- Ensure the payment status updates to “Payment is active.”

Why Activating Payment is Important
- Enable Commission Processing: Activates the system to charge commissions and fees after the waiting period.
- Product Visibility: Necessary for your products to be showcased on Sellencer.
- Buyer Redirection: Facilitates redirecting buyers from Sellencer to your Shopify store.
Need More Help?
- Detailed Terms: Visit our Shop Terms & Conditions.
- Support: For any questions or further assistance, please contact us.


